Showing posts with label master bath. Show all posts

Saturday, October 27, 2012

Mirror, Mirror on the wall...

These are a couple of special pieces displayed on our vanity. The silver tray was my mothers who inherited from her grandmother and the little piece of blue & green art glass was my grandmother's. It's a small piece that I really wanted because it brings back sweet memories from my childhood.

Ready for another peek into my master bath redo on a shoe-string? This is something MANY of you will be able to do yourself. It's a super easy update and not a really new idea.


Master Bath Vanity "before" it's update.

As I mentioned last post, we had a bathroom that was showing some age and hadn't been touched since the builders called it a wrap over 12 years ago. It even still had the "builder beige" on the walls! That was an easy fix with two coats of "Whispering Spring" by Benjamin Moore, a lovely light teal/aqua blue with just enough yellow/green to keep it from feeling cold and icey.

The part I stressed over was the fact that I had a MASSIVE sheet mirror on the wall that would not be easy to remove by myself. Yes, hubby is helpful and very patient with a constantly evolving house, but I do this stuff on my own as much as possible... especially if I decided to do something that he will see no reason for. I mean why would you take down a perfectly good ginormous mirror? Umm... let me count the reasons!

Master Bath mirror and lights after update. Amazing what a little tweaking can do, isn't it?!
Seriously, there are some good aspects to a large mirror. You never fight over who gets to use it and it reflects tons of natural light, making a room fill twice as big. That said, it also looks cheap and dated. The automatic fix was to make a frame. I looked into the cost of Mirror Mate frames, but it still didn't fit into my shoe-string budget. Almost two years ago, I received a miter saw for Christmas from my parents (they know how to make this girl happy!) and one of the things on the immediate To Do list was to make mirror frames. After finishing the cabinet reface on the rental house I renovated last winter, I had leftover trim. I used part of it to make the sides and bottom of the frame (which had mitered corners) and used a simple piece of door casing trim across the top (no mitered cuts at top - just straight and easy). All pieces were primed and painted the same as my trim prior to installation. Then, I simply used Loctite Power Grab to glue it straight onto the mirror! Since the mirror is held on to the wall by metal clips I still have the possibility in the future to take it all out without ruining the drywall.

New towel rings and cabinet hardware in brushed nickel help to finish off the update. Be GONE shiny brass knobs!

This whole project took about two-three hours from start to finish if you include painting, letting it dry and recoating. And, since the only piece I bought was the case moulding that runs across the top, I only spent about $8-$10. A quick, easy, and cheap update that makes a HUGE difference.


Sunday, September 30, 2012

Upcycled Vanity Light


                      Source: decorpad.com via Miss B.e.e. on Pinterest 

These were my main inspiration pictures for my master bath redo.


                                             Source: houzz.com via Miss B.e.e. on Pinterest
 
This post is the beginning of a few on one of my most recent personal projects. It's only taken me a couple of YEARS to get it finished (and it seems like that long to post about it!), but hey... I'm just happy it's actually done! When we moved into this house, the master bath only had one or two things going for it. It was HUGE, had a nice tub and separate water closet, which is something I like in a house. The rest was, um, builder grade and boring beyond belief.

Master Vanity "Before"

The house was eight years old and the master still had the builder beige on the walls, gold/brass hardware and trim, glass block window, gray & white swirled cultured marble counter top, basic 12" ceramic floor tile, huge sheet glass mirror, cheap builder grade vanity lights and faucets in a mix of satin nickel & brass (!). Fortunately, the former owner had invested in the items that are much harder to update like the whirlpool tub and shower. They aren't what I would pick style-wise if I could start from scratch, but they are good quality and workable. Eventually I'd like to replace the tub with a free-standing floor model and take out the acrylic shower in favor of tile with glass surround. But, those are two very pricey and in-depth renos that may or may not happen any time soon.


                                                     Source: fortheloveofahouse.blogspot.com via Miss B.e.e. on Pinterest


In the meantime, I have worked on updating what I could on a tight budget. One of the most recent things was to redo the lighting and that is what I'm sharing today. Here's what I started with:


Vanity Light Before
As  you can see, the lights were pretty basic. They could have been much worse, but I wanted a change from the expected glass globe down lights. Initially, I looked for replacements. I found several I really liked and if you followed me on Pinterest you saw me pinning them. Here's a few I liked:


     Source: restorationhardware.com via Miss B.e.e. on Pinterest 

                                                         Source: lnt.com via Miss B.e.e. on Pinterest 


                                                       Source: wayfair.com via Miss B.e.e. on Pinterest


All of these options were still going to run a minimum of $100 each and like I've said before, I'm redoing a house on a super tight budget - one that squeaks! That was a conscious decision on our part for me to be home the kids, so I'm not complaining. They are worth far more than any "pretty" house! That said, I still want my home to look nice so I've become very creative on redoing on a shoe-string, and that creativity was tested to the limit with this project!

After taking down and reinstalling numerous off the shelf options from the local home improvement stores, nothing was working for me. Darn that champaign taste! I knew what I wanted, but couldn't afford it. Then a light bulb went off! One day after starring for "hours" at the old fixtures, it hit me they had a pretty good base shape. It was just the globes and color I hated. Could I recreate a satin/brushed nickel look? I've not liked any out of can options, but decided to experiment. I used both chrome and satin nickel spray paints in layers and got a good match to the existing faucets I was keeping. Bingo!

Now to do something about the glass shades. I wish I could tell you this part was easy, but it wasn't and you won't get a tutorial on this because I'm not sure I'd recommend doing it unless you have help like I did from someone with the right tools and know-how! Long story short, with my dad's help, we took out the medium base sockets and replaced them with candelabras. Goodwill shades found for $1 apiece were wrapped in white organza ribbon and wha-la! I had three light sconces I love for approximately $20 in parts and free labor. Just goes to show, if you are determined enough (read: stubborn) and think hard enough (read: drive yourself & your spouse crazy), you can find a cheap way to reuse more than you ever imagined!

My upcycled vanity lights!

Gotta say, I'm pleased as punch with my "new" vanity lights!


Monday, May 16, 2011

Amazing Recycle and a Knock-off

Man, I've been MIA lately, haven't I?! When Blogger went down last week, forcing me to take a little hiatis from the blog, I dove into my painting and got lost. I also took some family time all of which equals several days with no blog post! Anyway, I'm back and I have the coolest thing to show you!

There are a lot of recycled and refurbished items out there. To be honest, I don't like a lot of them. It's that perfectionist thing again. They just tend to look....um....recycled, and not in a good way. The creations that really grab me are the ones that are amazing uses of things that don't look like what they actually are.
Case in point:

"Optical (2007)"
via Stuart Haygarth
Is this thing not gorgeous?! Artist Stuart Haygarth created this beautiful work of art. Can you guess what he made it from? It's the lenses from old glasses!!!! Here's what his website said about it:

The Optical chandelier is created from over 4500 prescription spectacle lenses. The lenses are hung on monofilament line which hang from a platform. The lenses form a spherical shape which imitates a disco mirror ball but rather than the light being reflected the light is refracted through the many layers of glass lenses. A magical explosion of light is created. The light is illuminated by a clear 100w incandescent bulb.
Materials : Prescription spectacle lenses, monofilament line, sprayed MDF platform

I stumbled across this one day when I was looking for some inspiration to create a chandelier of sorts for my bathroom to hang over the tub.  This is the one I wanted:


Beaded Capiz Shell Chandelier
via Designer Home Interiors (no longer available)
 
There was just one small problem, while I don't have the price written down, I know it was WAAAAYYY out of my budget! So, I started looking for a way to recreate what I wanted. I considered other cheaper versions like the one at World Market ($69.99 = too much for too little) shown here:

Capiz Hanging Pendant | World Market
World Market Large Capiz Shell Chandelier
They all just seemed to wimpy as well as too expensive for my unfortunate "Champagne" taste. I thought about ordering the shells to make my own, but that wasn't going to save me much money in the long run. Gotta be another way. Finally, I found this on Design Sponge:

http://www.designspongeonline.com/2010/08/diy-project-brennas-paper-capiz-shell-chandelier.html

 As nice as this is, I didn't care for the ribbons and wanted the crystals as shown in my "want" photo. So, I got out the wax paper and went to town. Yes, that is WAX PAPER! I followed the directions for above for the most part, but I did a few things different.


My Supplies

 First, I used a plant basket I had on hand that I gave a fresh coat of glossy white spray paint. Then, I used fishing line and hot-glued the discs to it instead of ribbon. I sprayed the whole thing lightly with Folk Art Finishes Pearlcote Glaze Aerosol Spray and found some little crystal beads that I glued to the end of each line. This and the crystals are what turns a DIY project into a "piece de resistance" (not really, but you get the idea)!


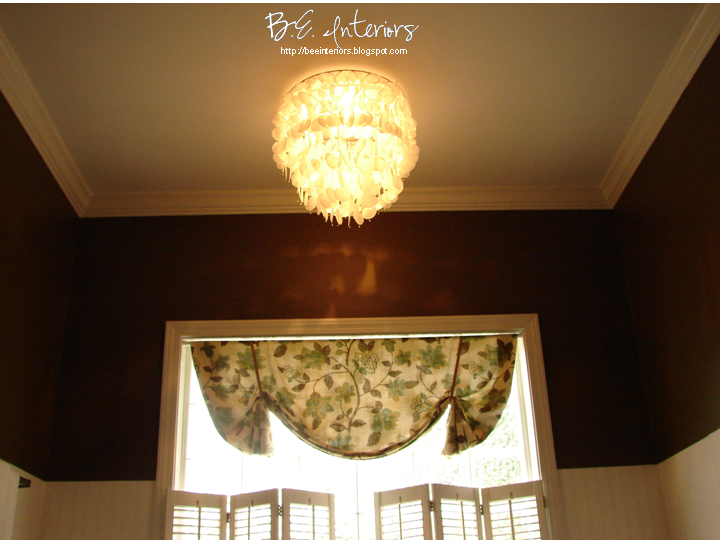
The other problem I had was the building code around these parts won't allow a hanging chandelier over a tub and the existing light was a recessed can light with an ugly plastic cover over it. So, I popped the cover off, held the basket to the ceiling centered over the light, and marked three evenly spaced points around the circumference. Then, I inserted three small white cup hooks into the ceiling and put in the brightest halogen bulb the recessed fixture would handle (cooler than incandescent). Lastly, I hung the "chandelier" in the cup hooks and wha-la! I had me a classy "capiz" chandelier for less than $20 that also met code.


Updated image with center crystal droplet.

Updated image.

Ditto:)


I'd still like to tweak it some. I may recreate this again if time ever permits and use a better basket I found at my local farm seed store. It is better suited to create a cascade effect of the "shells". I'd also hang each section at alternating heights so the "shells" don't create vertical lines going around the basket. Other than that, it came out pretty good.

If you want to find some beautiful stuff that could be recreated with some imagination and hard work, check out this website: http://www.olystudio.com/index.html. There are so many things on here I'd love to recreate for way less than they sell it for:) In fact, look what I found today while hunting for the "want" chandelier image - talk about coincidence!


It's called the Hanna Shelf. Look Familiar? Check out my Old Shelf Redo post.
Miss Bee

p.s. If you want your "shells" to look even more like Capiz, don't over-iron. Perfectionist...here...went and ironed all the bubbles out, then realized they look more authentic with. This one of the reasons I want to redo this project. I also forgot to add the main big crystal in the center, so I've attached it and retaken a couple of photos. - update on 5/24/11

Linking to:


Follow Me on Pinterest