Saturday, August 20, 2011

My Twiggy Chandelier for a Fraction of the Price!

O.k guys. I know ya'll have been wondering if I was just all talk about the dining room being redone...especially the chandelier, right? I'm not, I promise. I'm just not able to work on it full time, so it's a slow process. Hang in there with me, o.k? I'm taking it step by step. Rushing never produces anything as wonderful as what patience and diligence can.

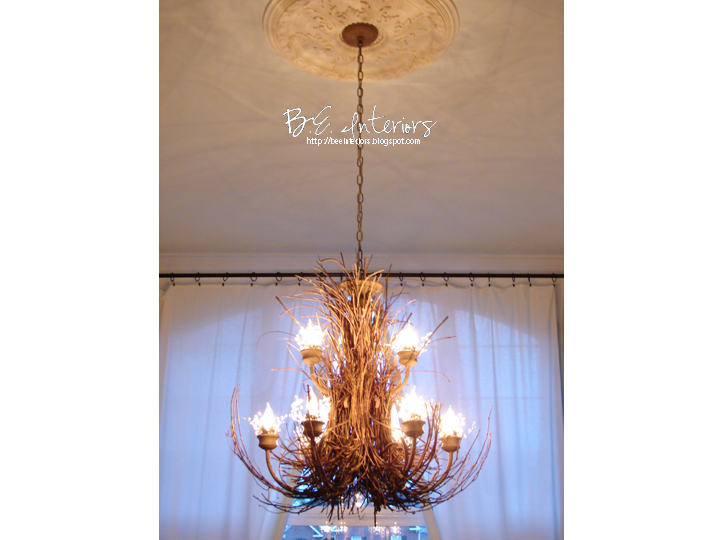
I've chalked off one more thing on the list: recreating a twiggy chandelier from my existing one! Wha-hoo! I've been a little nervous wondering if I could pull this off without it looking like a pile of kindling tied to the ceiling. The result is...exactly what I was after (thank goodness), and I LOVE it! My hubby thinks I have completely flipped my lid to put sticks on a perfectly good chandelier, but I love the after. When my sister-in-law walked in this evening, it was the first thing she saw and couldn't get over it being the old piece reworked. She thought it was gorgeous...which is exactly what I needed to hear - confirmation that it was worth the work.

Here's a look at my inspiration pieces again:

coral/twig chandelier
I wanted to go white, but the hubby would have REALLY flipped if I'd dared to paint
theexisting chandelier for fear I'd ruin it. If it had been hideous to begin with, it
would be a different story, but it wasn't.
This has become my inspiration room due to color and style similarity.
via Suzanne Kasler

Maybe the hubby will allow the white now that he sees it did turn out good!
via http://tartanscot.blogspot.com/
My study piece.

This is what it looked like to begin with:

It started like this.

Then I took the globes off to see what I could do with it.

Then I put the globes back on after repainting and liked it a little bit better, but still wanted to try the twiggy look. At least I knew if it didn't work, I was o.k. with the original now.

And now, the Pièce de résistance:


Ta-da!


The glass garland was an afterthought to add a little "juxtaposition" and sparkle.

I love the way the light plays through the crystals and twiggs.

I'm really liking the mix between the rustic twiggs and crystals. Fun!


How cool is that pattern on the ceiling?!


It's really not hard. Just takes time and lots of tweaking to get it just right. Total cost? Only $28 buckaroos! If you don't add the crystals, total cost is $0! Can't beat that. I still want to play around with adding some silicone light bulbs and may decide to extend the sockets out to look more like a candle. That's the thing about being a perfectionis: you never feel like it's good enough! Ugh! I do love the way it's turned out, though. Pleased as punch:)

I'm curious as to what you think. Drop me a note and let me know! I love hearing from my readers. Each morning I get up eager to check my email to see what you all have to say. There will be a tutorial coming for this if there is enough interest. I'm guessing...just from googling how to make one...that if you like it, you'll want to know how I made it. It's surprisingly easy, just takes patience. (In my best southern, hill-billy accent: "I'm gonna learn you some patience 'for it's all over with!")

Have a wonderful weekend...and take time to thank the good Lord Jesus for all he's blessed you with! I'm thankful for so much, but today I'm especially thankful for a creative mind and hands to make whatever comes into it:)


Sharing with:
Show and Share Day

HOG 
 
Photobucket

Friday, August 19, 2011

Until Tomorrow...


Howdy, folks. I am DYING to post my new and improved chandelier (which is finished!) and have tried to get the pictures taken tonight, but the post will just have to wait until morning. I'm fighting a bad head cold/allergies and the Benedryl is kicking in...zzzzz. Just wanted you to sit on the edge of your seat until then:) Aren't I sweet (wink, wink)?

Wednesday, August 17, 2011

Little Guy's Nursery

It's been awhile since I showed you a room in my house, hasn't it? There's two reasons for that. First, it's not a HUGE house, although it's a comfortable size, so there's a limit on rooms to share:) Second, we've lived in this house about three years during which we had our third child, which means I am still working on getting it the way I like it. Notice I said "I", not "we". That's because I am very blessed to have a hubby who doesn't care much about how it looks, as long as it's neat and tidy. I could paint a wall purple with pink stripes and he'd probably not even notice, but if all the toys were dumped out around the house and left for days on end, he'd get a twitch!

Since you've seen the family room, dining room before and in progress, master bedroom, and my oldest boy's room, it's time to let you peek on in just a little further. This is my little guy's old nursery and will be his bedroom when he and/or my middle boy decide they've had enough of sharing a room.


Nursery/Guest Room "After".


I love this room. I've sat in here many a morning with my coffee. Something about the color and the way the light comes in is so relaxing. When I was about 8 months pregnant I stripped it out and redid it for little guy, who was well on his way. I actually liked the color it was to begin with, but it didn't work with the bedding we'd selected.

Nursery/guest room "before".

In the past, I'd done all the decision making with the nurseries and decided this time to let the two older boys help me pick out some new crib bedding (you can already see what's coming, can't you?!)...then I nearly choked when they decided on...what else? CAMOUFLAGE! Seriously?! Can they not get enough of this stuff? This would be God's sense of humor with me. If I hate it, he'll make me have to deal with it. Always has. I know he was belly laughing as I stared in horror at the bedding they were holding in front of me! But, I try to always keep my word, and I'd said "You guys can help pick out the baby's bedding this time". After praying for God to hit the rewind button and hearing him say "NO WAY!", I picked it up and headed for the checkout counter.

It really wasn't that bad and grew on me quickly. It just wasn't what I'd imagined and took me a few minutes to come around to the idea it was actually workable. This was the set they picked out by Wendy Bellisimo:

"Blue Camo" by Wendy Bellisimo


My third pregnancy was such a blessing, but I was incredibly miserable physically. As I tried to pick out a  paint color I was having horrible headaches and apparently the pressure on my optic nerves was so intense that my vision was affected (which I didn't realize at the time). I painted the whole room... only to realize it wasn't the right shade (and got it on the sand colored carpet in the corner! I was convinced hubby was seeing things or messing with me until after I had little guy and saw it finally with clear eyes!). So, I fell back on my old stand-by...mix it myself. I had it matched and repainted the whole room AGAIN that same day.


The crib used to sit where the white dresser is now.
Next, I bought three or four extra matching camo crib sheets and five twin bed flat sheets. Patterns were drawn up on wrapping paper and window valences made and lined with the extra sheets. The remaining
four panels were the flat sheets on hospital tracks that could be closed to darken the room a little more if need be.

My box pleated window valences and panels made from sheets.
Next, I took four 12'x12' wrapped canvases and painted them in white with a khaki border. Next I glued ribbon on the line and buttons on the corners. Lastly, I took scraps of camo sheets left over from the windows and cut out wildlife images that were decoupaged onto the canvases. Wha-la! Nursery art that I didn't spend more than about $20 max on.

Custom wildlife art work made from sheet scraps, ribbon, paint and buttons.


The remaining camo scraps were turned into art work.

Last, but not least, I needed something over the bed, so I got on line and hunted for inspiration. This was a tiny woodworking pattern that I liked so I printed it out, then enlarged, and enlarged, and enlarged, and...you get the picture. Finally it was big enough to print and tape together. Then I cut it out with an Xacto knife, and traced it onto a heavy weight art paper, cut it out AGAIN and attached it to a fabric wrapped canvas with spray adhesive to keep the paper from bubbling. Done!


Although painted in a light aqua blue, it's not baby blue and is a very adult color. I deliberately tried to take it beyond the nursery stage so that it could stay as is for a number of years. It's really been a surprise how many people don't even notice that the fabric pattern is camo! I guess because it isn't being seen in a typical context, the pattern doesn't even register. Bingo. We (kids and I) both got what we wanted:)

Even though little guy is now sharing a room with his middle brother, he still calls this his room and loves it. Personally, I'm going to be sad when he want to repaint. I LOVE this room.It's currently the guest room
until Middle Guy decides he's had enough sharing and wants the room to himself (i.e.- is no longer scared of the dark!).

Linking up to:
Photobucket

a beach cottage

No Minimalist Here

Transformation Thursday Button


Tuesday, August 16, 2011

Style Evolution

"Pink Lilly Pad"
B.E. Interiors Photography 
Blogging is a funny animal. It takes a while to find your rhythm and niche. I'm still exploring mine, but the fog is starting to lift and the vision is getting clearer. If I've learned nothing else, it's that regardless of whether I'm any good, I love writing! It's so much fun sharing my photography/design projects/ideas/thoughts! It's now been five months and I'm getting much more comfortable and figuring out some of the quirks, but I've still got a ways to go. You'll probably see the blog changing a little in design (hopefully for the better) now that the boys are back in school and I finally have time to finesse it without much interruption (cue the Hallelujah Chorus!). I'm also learning a lot about myself. Who knew? Self discovery as well as a creative outlet!


"White Lilly Pad"
B.E. Interiors Photography
 One of the things I've learned is I am truly a design mutt...as I stated early on. I don't have just one style that I stick with. Part of that is due to the aging process. In case you've not noticed, as you get older, your style changes and morphs into something totally different that what it was to begin with. There is also what you like versus what is practical for everyday life. I suspect most of my readers have noticed this evolution in their own life.

 
When I was younger and sans kids, I loved the glamorous traditional/transitional style. It is so elegant and pretty! But, it has a down side. It's tough to pull off with kids...especially boys! Their idea of inside play is tossing a Nerf football versus a real one! Not making a mess means brushing the crumbs onto the floor or under the pillow before mom sees them on the sofa. Picking up your room means throwing it all in one of three places: in closet, under the bed, or in the dirty clothes hamper (dirty or not). Cleaning up a spilled SWEET drink means getting the dog to lick it up. You get the idea.

Enter rustic mod country style. It's soooo much more forgiving and easy with kids. As my style evolves, one of the things I find is I initially gravitate to the glam pretty look, then realize it's not functional or practical for our life. It gets revamped and I end up with the more casual rustic look combined with the former - thus my love of the word "juxtaposition". The great thing is that this look is now actually popular! I believe it's called Rough Luxe. Restoration Hardware, Pottery Barn and Wisteria have all embraced this look with arms wide open. It tends to incorporate Scandinavian design, rustic, and old French elegance. Here's some examples of this look, not all of which are exactly me, but they cover the gamut so that you can get a good feel for what this style actually is:

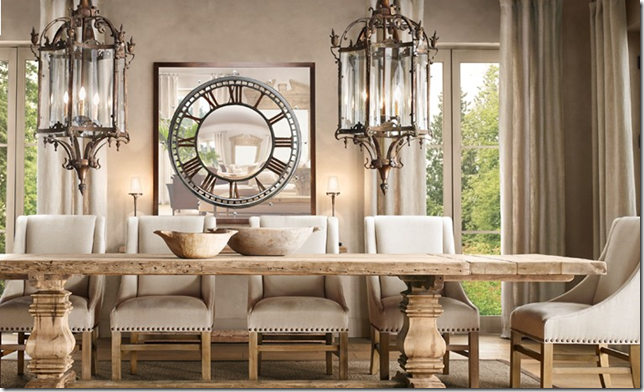
Suzie:  AMI Designs  Beautiful modern French dining room design with Restoration Hardware ...
Rough table with formal, yet weatherd wood chairs juxatoposed with parque floors, crystal chandelier and lots of moulding. LOVE this room, although it could use a rug.
via AMI Designs


asdd
Restoration Hardware has gone hard core rough luxe lately!

image
Worn paint on furniture, rough timber beams juxatposed with new fabrics and rug
and traditional accessories. Really like this room as well.
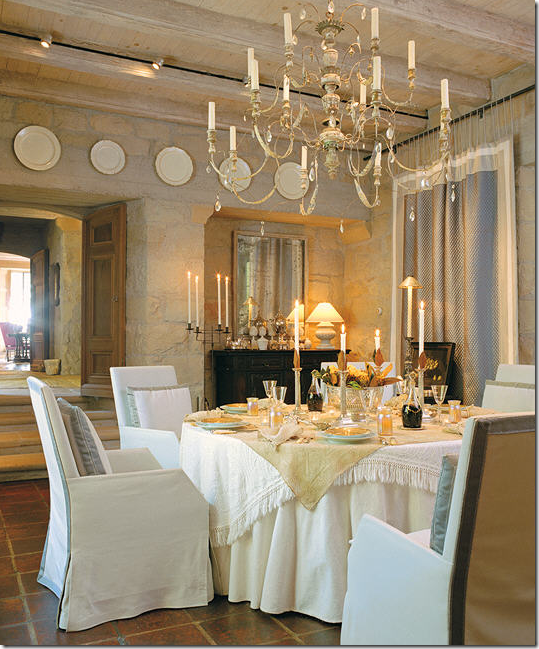
Charles Faudree Design


image
Crisp new slipcovers/linens and silver juxtaposed with old looking structure of stone/wood
and aged mirror/lighting. Very pretty.
via Cote de Texas

dining rooms - white baroque floor mirror rustic wood dining table white slipcovered dining chairs glass bubbles pendant chandelier  Mark English
Perfect example of Rough Luxe: farm table, modern glass (shiny) lighting, baroque mirror and crisp white slipcovers. Total mix of old and new.
Mark English Architects

Suzie:  Kay Douglas  Atlanta Homes Mag  Beautiful white & yellow living room design with white ...
Modern style sofas/chairs with crisp white slips versus square log tables/stools, rough natural doors, and funky stick chandelier.
Kay Douglas Design

Suzie:  Christopher Peacock Traditional Home Mag  white & orange light & breezy living room ...
Transitional sofa, slips, rug, draperies accessories versus rough hewn table and sawhorse legs!
Loving this and the pops of orange.
Christopher Peacock Design
Suzie:  Barbara Westbrook  Pieter Estersohn Photography  gorgeous cottage foyer design with ...
Perfect. I'll take one please.
Barabara Westbrook Design


Rough natural cut floors and twiggy chandelier juxtaposed with modern metal/linen(?) chairs,
traditional sofa with white slip and transitional chairs and shiny modern garden stool and art.
via Remodelista
 Rough luxe is basically combining opposites - lots of rough wood and worn finishes mixed in with expensive looking finishes like crystal, silver, gold, mirrors, etc. I love that it's so acceptable now to mix it all up. Rough floors, worn paint and leather, nicked and dinged wood - great for kids. A little shiny, pretty stuff - satisfies Mom's need for style. If I had to stick to one pure design style....well, I'd just be the rebel without a cause - BDD (Bi-polar Decorating Disorder!).


Follow Me on Pinterest